Video Tagging
Use Video Tagging to load a match video, align the match clock with the footage, and capture events in sync with playback.
Before You Start
In Preferences, choose a workspace layout for video tagging. Tagger has three layouts:
- Standard - both teams' player buttons either side of the screen with the event buttons in the centre.
- Video Analysis Mode - the video and events table on the left and the player and event buttons on the right. Larger devices only.
- Live Manager Mode - a manager-centric view focused on your own team with a team formation pitch graphic.
Video Analysis Mode is recommended because it provides the most efficient layout for video review and tagging. See Preferences for the full list of options.
Create a New Game
Open the Game menu and select New.
Enter Game Details
Game setup is a four step wizard: Setup, Team A, Team B and Video.
- Setup - optionally add competition, date and venue details, then select your Sport Configuration. If this is your first session the configuration list may be empty: select Import Template, choose the TeamOppy Catalog, then select the appropriate template. You can then adjust the players, subs, periods and minutes per period for this game.
- Team A and Team B - pick a squad to pre-fill the team name and lineup, or enter the team manually. Set the name, logo and colours, and build the lineup in the Editor or Picker view.
- Video - choose your video source, then select Save in the top right of the wizard.
Select a Video Source
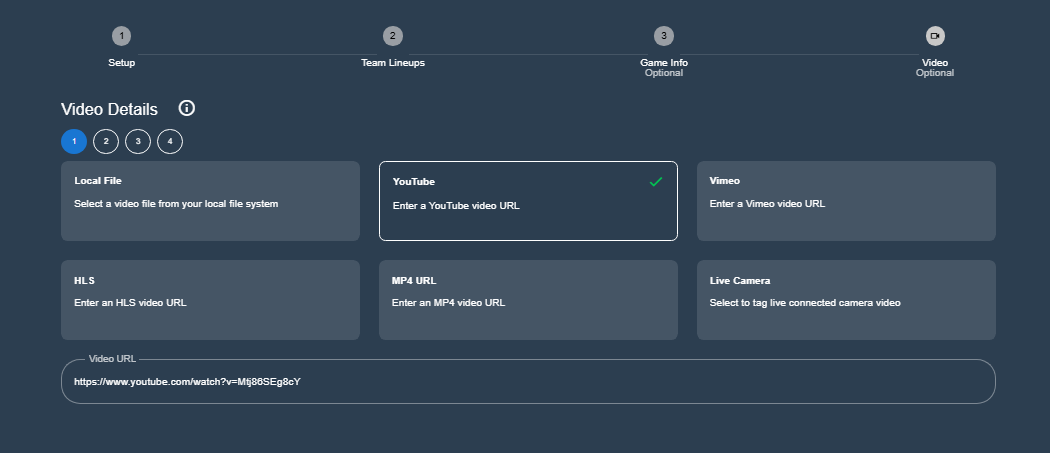
Tagger supports up to four video sources, numbered 1 to 4 in the Video step. Tagger supports the following source types:
- Local File
- YouTube
- Vimeo
- HLS URL
- MP4 URL
- Live Camera (desktop app only)
For YouTube, Vimeo, HLS URL and MP4 URL, paste the video link. For Local File, browse to the file on your device and select it.
Multiple Camera Angles
With more than one source in a game, turn on multi-view with the grid button in the video toolbar to show all the angles at once, or select a single angle with the numbered buttons beside it.
Angles recorded on separate cameras do not line up on their own. One may have started recording earlier than another, and a break cut out of a recording changes the difference part-way through the game. Use Angle Sync to match them up. The alignment is stored with the game and applies in the Tagger, the Studio, the clip viewer and Analytics 360.
Local video files give the most accurate alignment. A streamed source can only be seeked to within a fraction of a second, and each angle is a separate download, so angles are harder to line up and more likely to fall out of step during playback.
Set Period Start and End Times
Once the video source is set, the video loads in Tagger and the timer card appears directly below the player. Before you begin tagging, define the start and end points for each half, quarter or period so the match clock stays aligned with the video timeline.
The card holds, from left to right: the video transport (skip back, skip interval, skip forward, play/pause, reload), the period number, the clock, the timer settings, and the Start and End buttons.
You never choose a period number. The period is worked out from the period boundaries you record, and a guidance line under the card always tells you the next action to take.
- Use the video controls to move to the start of the match, then pause playback.
- Select Start. This records the start of period 1 at the current video position.
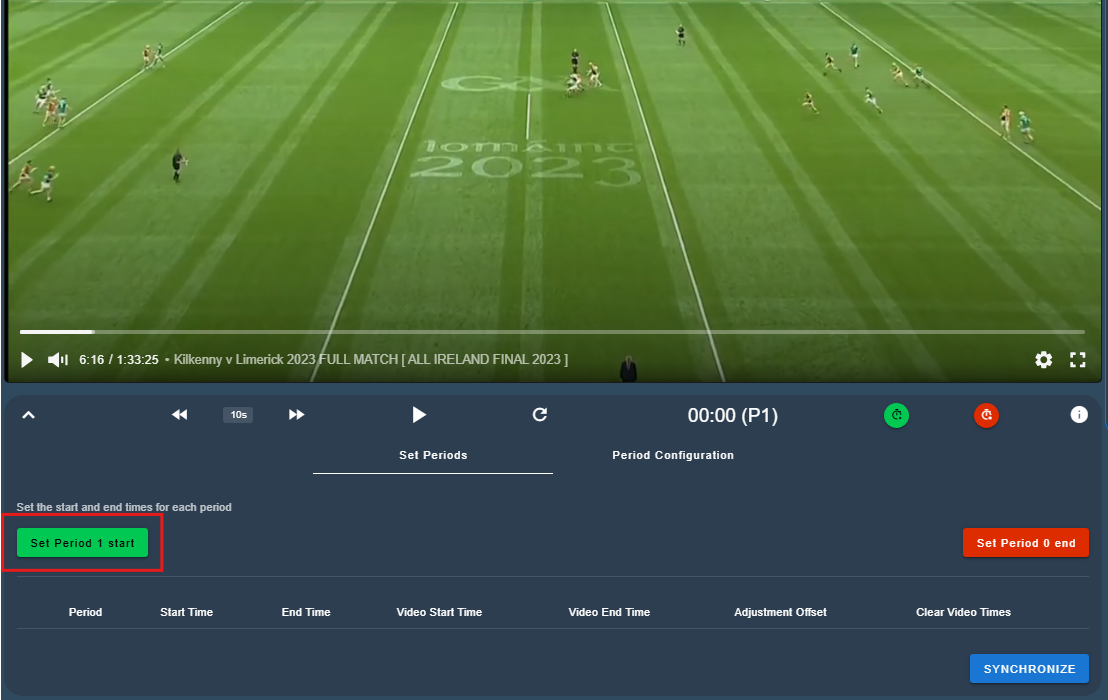
The guidance line now reads: Period 1 in progress. Click End when the period finishes.
- Move the video to the end of the current period.
- Select End.
The period is closed, the clock resets to 0:00 and the next period is selected automatically. The guidance line now asks you to move the video to the start of the next period and select Start.
- Repeat the same process for each remaining period.
Once the periods are recorded, the clock and the period number follow the video position automatically while the video plays, so you can scrub the video without losing the period you are in.
Begin Tagging
Once all periods are set:
- Return to the start of the match and start playback.
- Confirm that the match timer advances in sync with the video.
- When synchronization is correct, the player and event buttons become available and tagging can begin.
Automatic Pause and Play
Automatic Pause and Play helps you capture events more accurately, especially during complex sequences that include labels, linked events, or position maps.
When you select a player or event button, playback pauses automatically so you can complete the tag entry precisely. After the event is saved, playback resumes automatically.