Get Started
Get started with Tagger
Get Started
To get started open Tagger in your browser (Chrome is the recommended browser).
Create a New Game
In the Tagger page click on the Game menu option and click New.
Enter Game Details
- Select your Sport Configuration. The first time you use Tagger, the Sport Configuration list will be empty. Simply click on the Import Configuration button and choose the TeamOppy Catalog. Here you will find a list of Configuration Templates - click to select your Template.
- Next, select your squad if you have one already created or specify the team names and colors (you can specify a main color and a color for text).
- Optionally specify the Competition, Date and Venue.
- If you want to do video tagging then specify a video source. You can choose from using a Local file that is on your device or a YouTube or Vimeo url.
- Edit your team lists with the player details (number, name, short name and position).
- Then click save.
Set Tagger Preferences
From the left navigation menu, select Preferences. In here you specify how you would like the Tagger page to display the player and event buttons.
- Set the Events view to either Tabs or Full. With "Tabs" only one teams set of events will be displayed at a time. This may be preferable on mobile devices or if you are only concerned with tagging your own teams events. With "Full", both teams events are displayed. This is preferable on larger devices (laptops, tablets) and when you are tagging events for both teams.
- Set the Event button display to show either the name of the event, the short name of the event or the event icon. Short names and icons may be preferable for mobile devices.
- Set the Player button display to show full name or short name. Short name may be preferable on mobile devices.
- Set the Player button badge display. This is the little blue badge that is displayed on the player button. This can be set to display the player number or the player position, whichever is preferable.
Start the game
To start the game simply click on the Timer button near the top left of the page and press the play button.
Tag Events
The player and event buttons are enabled as soon as the timer is started and you can start tagging events by clicking on the Player and Event buttons. If an event is configured that requires a player to be selected then that event button will be disabled until a player is selected.
End a half or period
To end a half or period, click on the Timer button and click on the end period button (yellow whistle button).
Start a new half or period
To start a new half or period, click on the Timer button and click on the Play button.
End the game
To end the game, click on the Timer button and click on the Full time button (red whistle button)
IMPORTANT
Please note that game data is stored in your browsers local storage. Clearing your browser cache will remove the game data. After each game you should download the game - from the Game menu, select Download Game - and store on your local device. Only one game at a time can be open in Tagger.
Similarly, for other data like Configuration data and Squad data it is important to download this data to your local device to prevent data loss in the browser.
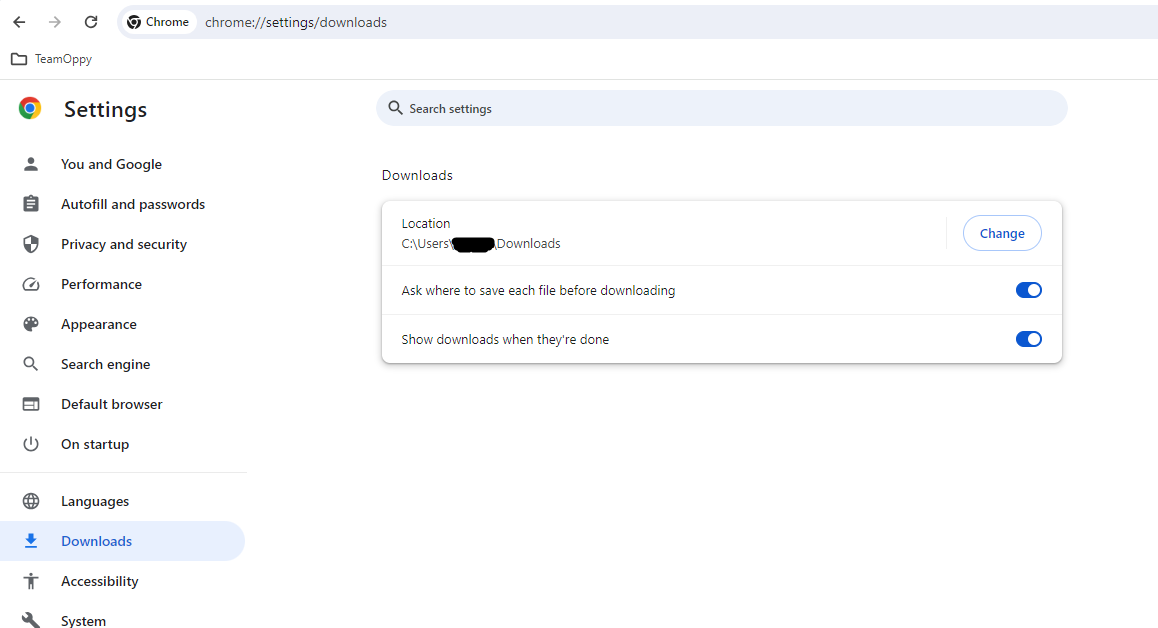
Tip
If using Chrome, by default files are downloaded to the Downloads folder of the users directory. You may want to change your download settings so that when you are downloading a game, configuration or squad that the browser will prompt you to select the folder to download your file to. See screenshot below. Select the switch "Ask where to save each file before downloading".
Share between devices
You may do live tagging on a tablet and then do further processing on your laptop post game. A handy way to share files between your devices is to utilise OneDrive, Google Drive or similar cloud storage tools.
